Wednesday, December 8, 2010

Cold but clear


It was very cold last night, and a snow storm is predicted for this coming weekend, but this morning the frost on the grasses and trees was very pretty. I took this picture on the way to the mailbox.


We still haven't gotten a delivery date for our SIP's walls and roof. It's looking like an installation before Christmas is not going to happen. If not, it will be pushed back to the week after New Years Day.

Tuesday, November 30, 2010

Waiting on our SIPs


Our order is in for production of our SIP panels for the remaining walls and roofs. The view below shows the east wall framing that will be inside the SIP wall. Drywall will be inside this framework. This will make the east wall of the kitchen a full 10 inches thick, though the space between SIPs and drywall will not likely be heavily insulated since the SIP provides R24 insulation on its own.

Under the wire


I was reminded on Saturday that I hadn't yet made a single entry in the blog in November. We have been busy, and lots has been done, but it isn't always clear what others might find interesting.

A contractor for our electric utility has been trimming trees along the power lines. They hadn't been trimmed on our property for years before we bought it. It was needed badly and they did a thorough job. All in all they didn't hack up our trees too badly.

The upside for us was about six truckloads of wood chips dumped where we asked for them. Sandy took on the project of moving them to where they were needed.

The pile of chips on the right above is about a tenth the size it was when Sandy started. Much of the chips was spread on the hill in front of the house.

Much, much more was spread on the leach field, probably over one hundred cartloads.

And yesterday, before it turned cold and nasty like it is now, she organized a final assault on the open soil above the house with cart and buckets that took about three hours, but got the whole area covered.

In the first picture you can see the progress made on the south walls. They are all framed and mostly covered with house wrap. The next post will show the east end of the house.

Sunday, October 31, 2010

Spooky night


Well it's Halloween and I just got done working. I've been trying to get a wall done each day. Two to go, but together they have two doors and three windows which take longer to frame.

Here's what it looked like at the site about 9:15.

Thursday, October 28, 2010

What a wind storm


Much of the Midwest experienced a major storm Monday, and we were no exception. The entire new house had been covered with billboard tarps for weeks but they had hardly been necessary. We have had some record-setting low precipitation months this summer and the soil is as hard as a rock.

A few weeks ago we bought some chrysanthemums at the auction. When we tried to plant them the next day I was unable to make a hole in the soil near the road, even using a pick ax. Instead we built a very small pool for them, watered them well and will plant them after the soil softens up. They should look great at the entry, next year.

Here are two shots of the building with missing tarps. It was cold today, and will be until midday tomorrow, but after that I'll get the rest of the tarps replaced. As shown in the second pictures, I'm now nailing long boards to hold them down so I don't lose another day replacing them.


Sandy's sanding project


After installing most of the old rafters from the 140-year-old barn, we decided they were just too grungy and Sandy took on the task of sanding them clean.

Here's an example of how they looked:


She worked on them for about a week, at least a few hours each weekday and some on the weekends. Our oscillating sander lost its pad, and though we tried to glue it back on, the connection only lasted an hour or so before it came off again.

She found a light belt sander and finished the job with it. It was worth the effort as you can see by this picture:


In other news, we've ordered our SIP roof and walls about ten days ago, and our windows about a week before that.

Thursday, September 30, 2010

Why a green roof?


As I was researching various aspects of our earthen roof-to-be, I came across "In Support of the Earth Roof", a brief article explaining the merits of what we are doing. I thought those following our progress might find it informative.

http://www.chelseagreen.com/content/in-support-of-the-earth-roof/

It's a team effort


Though I have been doing the bulk of the work on the new place, Sandy has been doing more than a fair share altogether. She keeps the apartment together, feeds us, and then comes down to the site and works there, too!

One day she's moving earth up above the building ...

The next day she's sanding rafters that didn't get cleaned before they were put up ...


Where will she be found next?

The end (of the rafter project)


It seems like forever since I started putting up rafters, but by the end of last week the task was complete. I didn't work on them every single day, but it seemed like it.

By the time I got to the last of the three rooms which will have a drywall ceiling and not be visible I was using shorter pieces of 2 X 6's, screwed onto longer pieces, and butted together on top of beams. I did not have enough to complete the west-side bedroom so I used 2 X 8's for that room. We have plenty of 2 X 8's left over and I hope to use some of them for a feature on the outside east wall.

All of the rafters are now covered with billboard tarps so they are a bit harder to see in the pictures below.


Don't worry, the posts in the picture above are not bent though they appear to be. It's a distortion due to the shorter distance from the camera to those two posts than to the others. The whole tree posts in the top picture do have slight bends in them.

Friday, August 13, 2010

The rafter project


It took two full days, with the help and trailer of my friend Steve Bonney, to move the 140-year-old rafters from the barn we took down from their storage site to the new house. There are enough to cover all the common areas - living room, kitchen and hallway. The bedroom rafters will either be purchased lumber or come from the stacks that came from milling timbers a few years ago. Of course they are also at the storage site, too, so, either way, more work will be involved to get them here.

Our engineer calculated that the old rafters could be used but they would have to be spaced 12 inches apart. I put a half dozen or so onto the front roof beams. It looked terrible. One foot apart was just too close together. It was hard to see any ceiling at all at that spacing. (The rafters in other rooms will be covered with drywall and not be visible.)

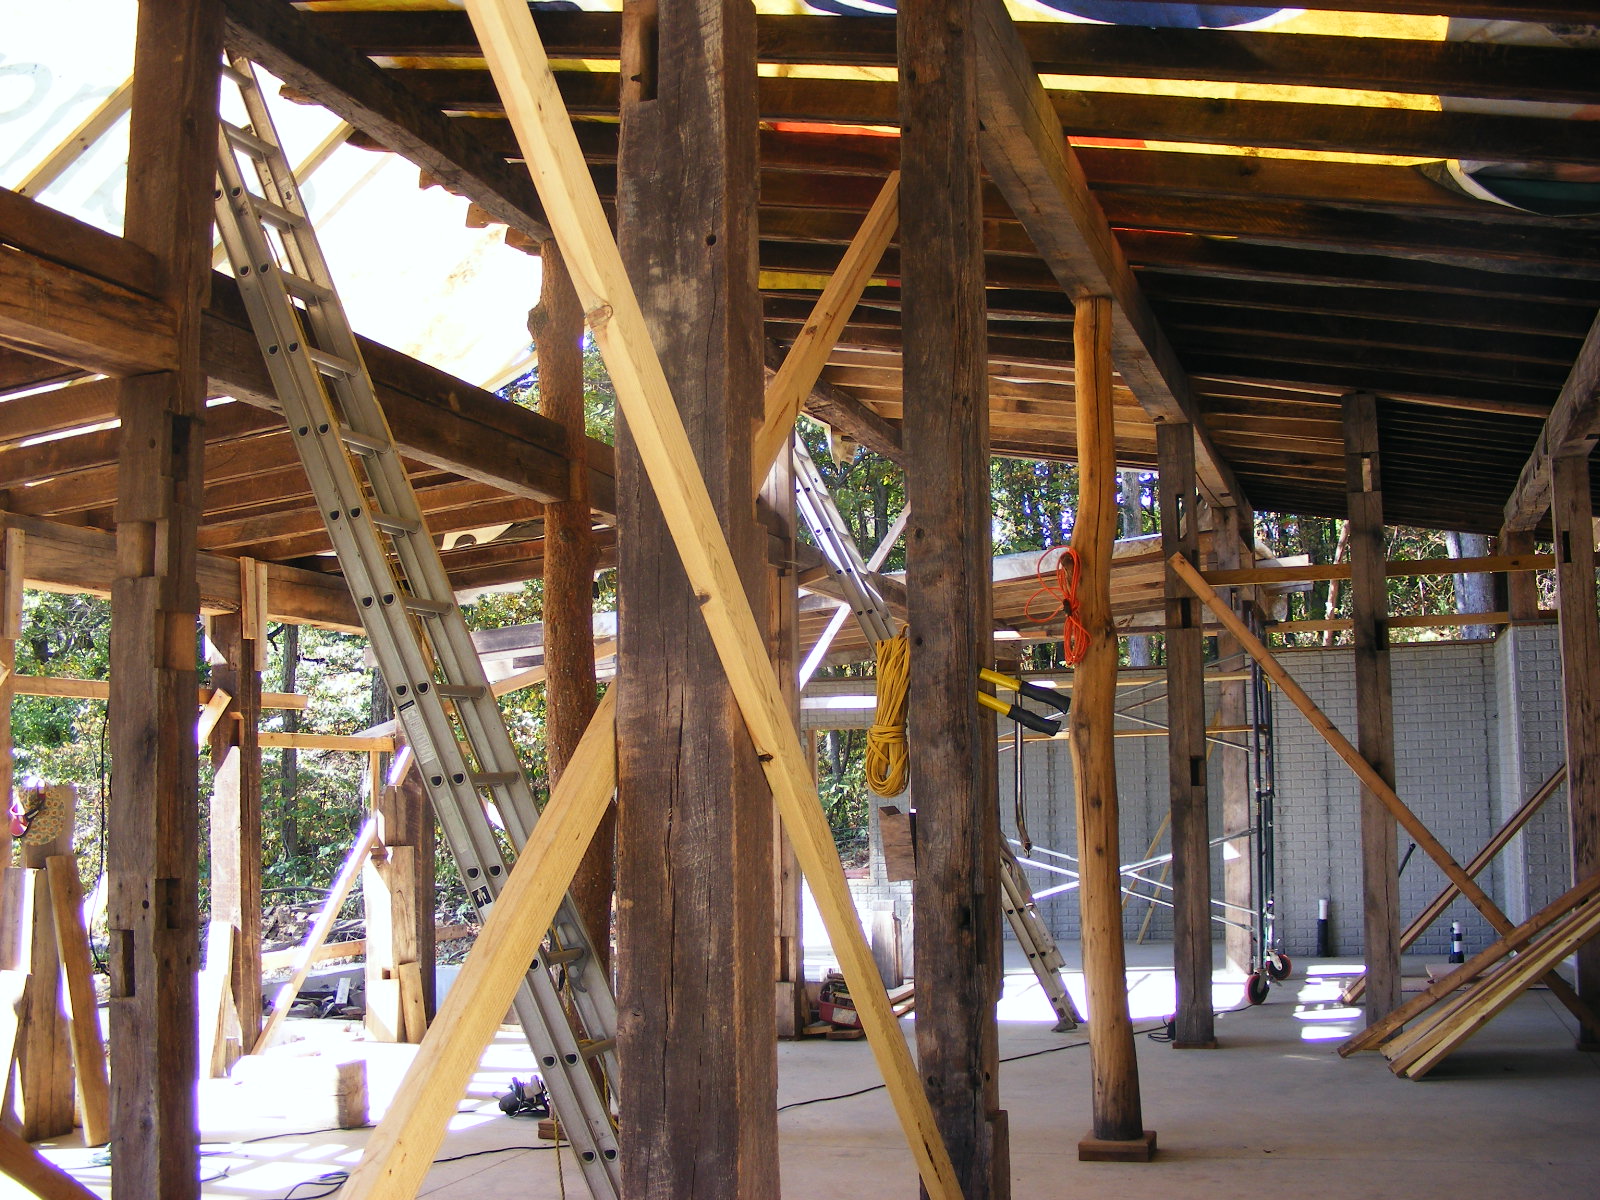
After checking with the engineer, we determined I could place rafters together in pairs at two-foot intervals and still be safe. To make them stronger I am screwing them together every 12 inches or so. I think they look pretty good in pairs.


On top of the rafters and under the SIPs we have decided to use paneling that looks better than the OSB panels used to make the SIPs. The picture shows what they will look like.

Two panels are just sitting on the rafters for the moment. You can also see shims that were used to make all the old rafters the same height. These will be trimmed off later.

Dragging the rafters up, cutting their ends even, aligning them, screwing them together, shimming them to a common height and finally screwing them to the beams, is a very tedious and time-consuming procedure. The final steps are attaching the high ends to planks that run crosswise to hold them in place, and separating the low ends with short sections of lumber to strengthen them. Also, since we will not have an attic, these short pieces are part of the material that will insulate along the tops of the outer walls.

Oh, did I mention it's so darn hot I can only work from about 8 AM until about noon each day. Heat indexes for the last week have been over 100 degrees almost every day. It's been two weeks since we've had more than a trace of rain.

Wednesday, July 21, 2010

Filling behind the walls


We also finally got the earth backfilled behind the concrete walls. Although a lot of hand shoveling and raking is still needed, you can see how the north side of the building now looks. It will be very easy to get onto the roof, eh?


Around the two windows in the concrete walls I hope to build some retaining walls from the rocks we uncovered during excavation. They should make nice little rock gardens just outside the windows. Here's my first try at it.


Above the wall on the west side I've scraped some small swales to encourage run-off away from the building. After a series of rainy days, it all seems to be working and the wall is holding up.

Lucas digs our septic drain field


The week after the Fourth of July, one of my sons, Ed III, came for a few days with his kids who live in Germany. Lucky for me, because I needed help installing the septic system and it appears Lucas has some skills we didn't know about. After helping drag some trees out of the area, Lucas asked if he could get into the trench. Ta Da!


That was fun enough, but the next thing I knew he was driving the bull dozer with the help of Scott Schroyer of Hash Farms Excavating.


To the right in the picture below you can see how thick the young woods were where the drain field was installed. Literally hundreds of small trees were cut down. I hope to use most of them in various ways, as archways, railings, wattle fences, plant supports, etc.


Initially we had planned to install a system that needed only two 70-foot runs, just a few feet from each other. Before the job started we realized there was not enough room to put in the line with the extra space needed for a perimeter drain as required. It would have run too far south where the terrain drops off quickly, way past the dozer shown above.

A request to install instead three 50-foot runs was denied. No reason was given, so we fell back to a "traditional" drain field. It was less expensive, but as you'll see it ate up an enormous amount of space - about twice what would have been used otherwise. In all we would dig up five 50-foot fingers spaced 8 feet apart and ten more feet on the west and north for a curtain drain.


Further, as the project proceeded we realized the drop-off east of the third finger was also too severe. To deal with this issue the other two fingers were angled to the east, across the trail near the hydrant. This wiped out the last buffer area to the west of that trail. The resulting open space is huge, but the deed is done and the system is ready to use.

Tuesday, July 13, 2010

Finishing the timber installation


With the last of the load-bearing posts erected, we were ready to lift the final, and heaviest beams into place. The beam being lifted in the first picture is one of the two strongest in the house. It, and the one next to it, with a cross section of 8" x 12", will support 150 square feet of roof which, when loaded with the roof panels and soil, will be approximately 9750 pounds.


For the morning I rented a crane from a company that installs large signs. In a few hours all of the large beams were in place and being secured with temporary plates on their tops.

When all the beams were in place we were ready to erect the last three posts. These three were all placed under long beams which were already supported so they needed to be cut to the proper height. It made more sense to cut them after the beams were up. Trying to get three posts exactly the same height, to the fraction of an inch, so there would be no chance of the middle one acting as a fulcrum if it were a fraction too tall was not likely to be successful.

One of those posts was the second tree to be used in the building, a walnut which had grown nearly where we placed it. The three pictures below show it being picked up from near where I had stripped off its bark. In the next it is being cut to the length needed to slip under the long beam, and the third shows it being tapped into place and secured to the beam and the bottom plate.


Whole trees are stronger than milled ones with the same dimension (diameter of the tree vs shorter dimension of the cross section of the post). So, though the tree looks small under the beam, it is perfectly strong enough in its own right. Once weight is added, it will take some of the weight from the posts on either side.

Finally, all the posts and beams are in place!

The garden grows

About a month ago I posted some pictures of the newly planted garden.

Things have grown...


Mid-June storm


Though this has little to do with our progress on the house, I thought you might like to see a storm that came through in about 30 minutes, from the calm before to the calm after.

It started with the cloud shown below that ran the entire visible length of the western horizon. Both the white and the dark are clouds.


Here's a view from inside after the rain started.


And here's a look at our new trail-stream a few minutes after it was over.

Wednesday, June 9, 2010

Let's add a tree


More of our timbers have been added. The first two rows from the south are nearly complete.


Since I had to cut a number of trees from the site, I had hoped that a few could be used in the building. Below is a sassafras tree that was about where the master bedroom is. Most of its bark has been removed in this picture.

It is obviously not straight, so marking and cutting the notches to hold the beams was part science, part hopefulness. The top is nearest in the picture. The base on the top was temporary, to aid in marking for the cuts.


Erected and seen from this perspective the tree looks almost straight. Other perspectives show it has a few bends.

It will be in the center of the largest open area of the house. Another sassafras, also cut down from the site, will stand beside it to its north, also in the center of the large room.


Notice in the bottom picture that more timbers have arrived. These include the largest and longest beams. They will be used for the longest spans remaining to be erected, across the master bedroom.

Tuesday, June 8, 2010

First timbers are up


After a few days of loading and unloading, measuring, cutting, lifting, rolling, loading and unloading again, the first timbers are on site and ready to be erected.

Here they sit, close to where they will go up.


One post up, thirty some to go.


The crew.


First top beam set.


It's amazing how tall it looks when it's upright!

Next, posts and beams


With the floor ready to use, it's time to start moving timbers from the Raccoon Creek site.

The pile that was here...

is now here...

and on its way to be resized for the house.

Finally, a floor


Before we could pour our floor we had to place all the drain lines, place the PEX water lines, bury the water and telephone lines, level the area with stone, cover it all with two-inch-thick polyurethane insulation, distribute the radiant heat water lines, and place the rebar.

Here's the result of all those steps awaiting the concrete pump and trucks. The extra thick piers are visible where the insulation doesn't show. We decided not to place radiant heat in the two small guest rooms. For those few times they will be used when the sun doesn't heat them, we will use a portable heater.

The pump has started pushing concrete to the farthest corner of the building.

Just the rest of the large room and the master bedroom to go. The pump shuts down between truckloads of concrete. The tube can be seen hanging to the left.

Ta da! Now we wait for it all to set, the crew will cut some slots in the morning, and the floor will be finished.

Graduation number 2


Our week away from home is nearly finished, but not before we see grandson Nicholas Riddle graduate. He has been at Carolina Coastal University for four years and plans to go off to Illinois College of Optometry after the summer.

Here's Nick going over the hill.


Dad (Barry), Nick, and Grammy (Sandy).


Since Nick was all packed there wasn't much for us to do, so we said our goodbyes and started home.

350 miles, 5 days, hmm...


We spent an extra day in Jacksonville with Andrew's family and left early the next morning heading for the Okefenokee Swamp. Our next "appointment" was a graduation at Carolina Coastal University in South Carolina.

We entered the Okefenokee via Georgia's Steven C Foster State Park. There we rented a canoe and paddled into the swamp. I'll let the pictures speak for themselves.


We took a tent with us on the trip but the weather was threatening so we wimped out and stayed at a nearby motel.

The next day we headed for Jekll Island, Georgia, in search of the The Georgia Sea Turtle Center on Jekyll Island. It's an interesting place. We visited the building where they rehabilitate turtles. That's where I found "Ed," an 18-pound, juvenile, female! green sea turtle who was floating abnormally when found last September near Jekyll Island. She is eating now and will likely be released soon.


Still a few days until graduation number two so we explored the rest of the island and headed north. We spent one more night in a motel and two nights camping.

The first camping night was on the ocean at Hunting Island State Park in South Carolina. We had a tent site no more than 100 feet from the beach and spent a few hours walking in the surf.

Our second camping night was on the Intercoastal Waterway at the US Forest Service's Buck Hall Campground. Our tent was fifty feet from a seawall on the waterway.

The next morning we stopped to pick some fresh strawberries (which survived about 30 minutes) and spent the better part of the day at Brookgreen Gardens near Myrtle Beach, leaving at the last minute to pick up Barry at Myrtle Beach Airport.