Monday, December 31, 2007

I guess they know it's safe


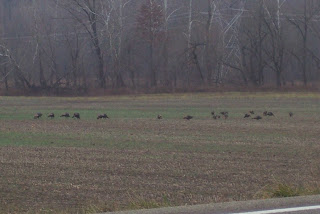
Nearly every day lately one can see a large flock of wild turkeys along State Road 54 just east of Bloomfield. The picture's detail isn't too good, but here they are.
Warm floors


It is getting cold and we're not quite ready to install the radiant floor heating system, but I thought I'd show how the system goes together. Our system is produced by The FloorHeat Company. Their web site explains the system in more detail. It is mostly a do-it-yourself process.

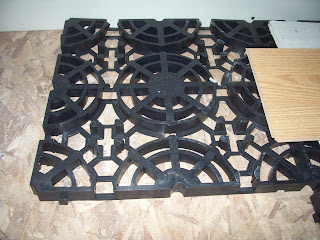
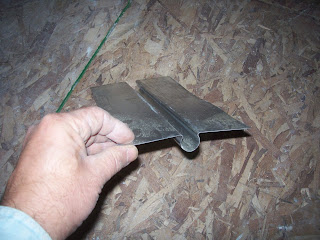
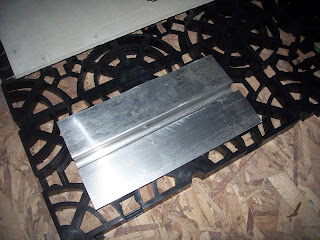
It starts with a thin sheet of foil that goes directly on the OSB floor panels. The foil is covered by 16-inch square plastic grids which snap together to cover the entire floor. Metal pieces are snapped into the grids. These will help transfer the heat from the plastic tubing which will be snapped into all of the grids to the panels which cover the grids. The panels are then covered by the laminate floor panels. The tubes are attached to a panel which contains a tankless water heater and a pump to move the heated water throughout the system.

Here is a grid, a metal piece, and how they fit together. Of course there are hundreds of them in the system.


When all the components are together it will look something like this:
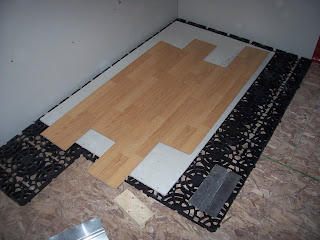

You can see four of the laminate panels snapped together. Under them is a 3'X 5' cement board panel. Under that are the plastic grids. The foil is not shown because I don't want to put it down until we're ready to do the installation. Finally, the OSB panels can be seen.

Notice the piece of 2X4 next to the floor system. It is the same thickness as the system. This allows us to build a wooden grid in closets and under cabinets that will have the same laminate sheets on them but will not be heated.

I forgot to take a picture of the control panel. I'll do that after the plastic tubing (PEX) is installed and the system is ready to go.
Has it been that long?


Once again, time has flown and I haven't posted for over two weeks. I've got a few pictures to share. I'll start with a follow-up on the previous post.

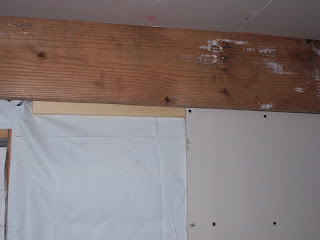
Using a 1" X 4" strip of wood behind the top of the drywall sheets did the trick. The drywall is solidly supported at the top, just as if there had been a full nailer there. It turns out attaching the strip to the drywall before erecting it wasn't necessary. In fact, doing so made it harder to get the drywall in place. It worked a lot better to just slide the wood strip up behind the 2" X 10" board at the top of the wall. The pressure from the packed cellulose behind the tarp section kept it in place while the drywall was screwed to it.

Here's a picture of an installed drywall sheet showing a section of the wood strip to the left of it. You can see the 2" X 10" board that runs the length of the long walls. The white on the board is from raising the ceiling drywall and will wipe off. I plan to sand the board smooth and cover the nails which hold the boards to the barn's main posts.


All the drywall in the apartment has been installed except for a few wall sections that will have water tubes in them. These need not be finished right now, and getting heat in the building is a higher priority. The next post shows what we're doing for heat.

Sunday, December 16, 2007

Getting the walls straight


I have been worried that the drywall on the outside walls will eventually bend in toward the room because of the pressure of the cellulose stuffed behind it. The drywall will be screwed into 2x2 "nailers" at the bottom and 2x4 nailers every two feet up the wall as well as into the 4x6's every 8 feet along the wall. But at the top of the east-west-running walls there is a 2x10 that supports the roof trusses. It is nailed inside the 4x6 posts. This means the drywall will come up under, but not behind, the 2x10's.

As an aside, when I first realized the 2x10s were at the top of the east-west-running walls I worried I would have to build those walls inside them. Instead we decided to make them an architectural "feature" and leave them exposed along the entire length of the north and south walls, even in the bedroom and bathroom. I'll sand them down and "spackle" them to hide the seams and nails, just like drywall, so when molding is added and they are painted it will not be apparent they are wood.

Here's what a typical 8-foot wall section looks like, shown with one sheet of drywall attached.


Even though there will be a piece of trim under the 2x10 that will help keep the drywall vertical, I am concerned that the trim, only being nailed into the 2x10, will not be strong enough to resist the cellulose pressure against the drywall. I've decided to add a 1x4 behind the drywall and the 2x10 by screwing the drywall to the 1x4 before putting it up on the wall. I don't think it will be necessary to attach it to the 2x10 because the cellulose pressure against the billboard tarp sections should keep it tight. Here's a closer look.
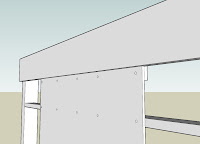


Here's the view from inside the wall. Of course the exterior sheets, the cellulose and the billboard tarp sections are not shown.
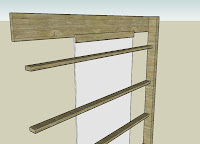


Of course this means the 1x4 attached to the drywall will have to be tucked under the 2x10 first, then screwed to the nailers below. If this works it might actually make it easier to install the drywall. So far, without the 1x4, the first any only drywall sheet I've stood up has been difficult to hold firmly against the wall. I'll write about how it works soon. Tomorrow I've got to go find 64 feet of 1x4's.
Our first snowfall


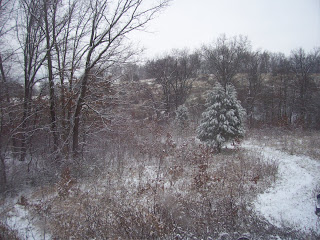
It wasn't a lot of snow but it shows where one of our sledding runs will be. The area in front of the trees to the left has lots of birds in it most of the day. They eat seeds from the tall grasses and wildflowers. The view is from the large window where the kitchen table and benches will be.

Tuesday, December 11, 2007

60 degrees at 8:00 PM


Each evening I work at the new apartment, when I drive back to the rented apartment, nearly the last thing I see before I get there is the time and temperature sign on a bank a few blocks away. Tonight, on the 11th of December, the sign showed 60 degrees! Who would have thunk it?

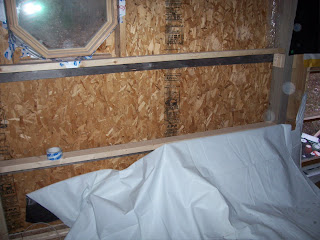
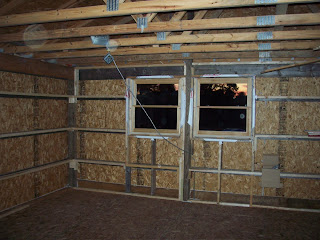
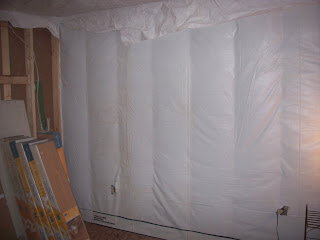
Today we got the insulation finished in the apartment walls (except for one section in the bathroom that still needs a support for the shower). Here's what a typical wall looks like full of cellulose behind sections of billboard tarps:


For those interested in more detail, there's another picture below. For the rest of you who have better things to do, that's all for now.

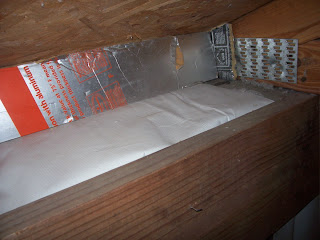
Since cellulose tends to compress over time, I have left the top of each section of the exterior walls accessible from the attic so more can be added if needed. Each section is covered by the tarp which runs up the wall and is stapled to the outside of the 2X10 which supports the roof trusses. Then it is pulled over the cellulose and held in place by the pressure of a small section of foam insulation board. Here's what that looks like:


From the top, you can see the roof sheets, the insulated board section, the tarp at the top of the wall cavity and the 2X10 that supports the trusses. Also, to the right, you can see one of the plates that are used to construct the trusses.

After the ceiling drywall is installed, the insulated boards will be removed to allow air to flow freely through the eaves and out the top of the attic. Before then I'll staple vent chutes to the roof so that the blown-in cellulose will not flow over the top of the wall to the outside. I don't know how I'll hold the tarp over the top after the insulated board is removed, but we'll figure it out.

Saturday, December 8, 2007

Christmas is coming


I can't believe it's been so long since I posted last.

All of the siding is installed except the peak of the walls at the east and west ends. The weather has turned nasty and there's plenty to do on the inside, so the peaks might not be finished until spring.

We are working on insulating the walls now. Since it is a pole barn, the outside walls are 7 inches thick so it takes a lot of insulation. We have chosen cellulose which is a recycled product, made here in Indiana, and also turns out to be the best insulator for the cost.

Normally it is blown into the walls, but we are filling them by hand as we put up the vapor barrier which is old billboard tarps. This picture shows the process and a typical wall section with the 2-foot spaced nailers in place.


Drywall will be installed vertically along the original outside walls and horizontally on the apartment's east wall which is vertical studs, 16 inches on center and not a true outside wall.

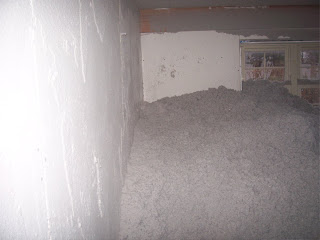
We started by breaking up the bales of cellulose ourselves. It was slow going and not all that effective. On Thursday we borrowed the cellulose blower from the store and blew about 30 bales into the bedroom. Sandy fed the machine for about 2 hours outside into the dark. I was inside where the cellulose was coming out of the hose, trying to bag as much as I could while it piled up like a gray snowstorm in the room. It even stuck to the walls like snow would in a blizzard.


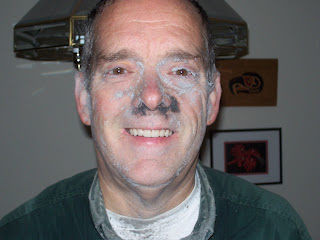
I got a bit covered with the stuff.


From there it is bagged and dumped into the walls. The entire process still takes time, but the cellulose is ground up more finely and it was all ground up in a few hours instead of literally days which it would have taken the way we had started.

Tomorrow my son is coming from Indy to help lift and install drywall on the ceilings. Sandy and I got enough of the walls insulated today to make his trip worthwhile.

All the electrical wiring is done except for two lights and switches in the attic which can be added even after the ceiling drywall is installed. The best part of that is no more extension cords everywhere.

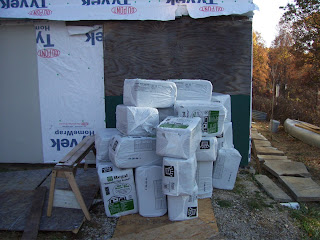
Our radiant floor system was delivered, too. It came on two large pallets. One had the tubing, the metal plates and the entire control panel with gauges, valves, and the no-tank water heater. The other pallet contained all the panels that will cover the floor. Stay tuned for pictures of that system.

Monday, November 19, 2007

The north wall is done!


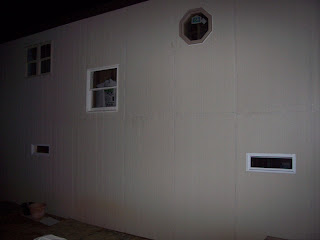
Except, of course for painting it, which will cover the caulked seams, trim on the ends and the windows and building soffets, the north wall is finished. The rest of the work will likely be in the spring. There is plenty to do on the inside after all the outside panels are installed.

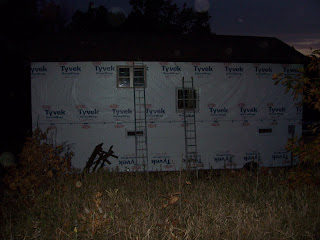
Here's a flash picture taken last night after the ladders were removed.


With two more days of warm weather promised, and with our improving skill (and I do use the term loosely) at putting up the second level panels, we just might get them all installed before it turns cold again.

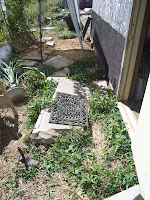
Rustic sidewalk moving along


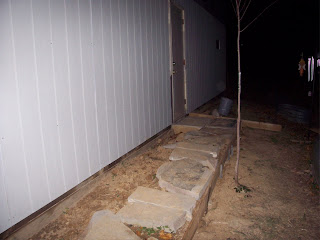
The rain has stopped, the ground has dried and the temperature has risen, so Sandy has been able to get back to the sidewalk project. Even with constant interruptions from me with requests to help lift wall panels, (or to help me find something I've misplaced for the umpteenth time,) things are looking good.

Armed with a carpenter's square and a tape measure, she is establishing, from east to west, a line that parallels the building's south wall. Then, with a pry bar and stones gathered nearby, she is leveling and aligning the large pieces of stone and concrete that we found scattered near there when we bought the property.

Edging is pieces of fencing purchased at the serve-yourself lumber yard in town.

Here's what it looks like so far. There is a lot of clay near the building, but the soil improves quickly as one moves down the hill to the south (right).


The fate of spindly tree next to walk is still unknown. It's been in the way while installing Tyvek and siding panels, but it won't be after that. The growth of its roots is the major concern.

Saturday, November 17, 2007

What am I doing wrong?


Can't understand it. I added 33 bales of cellulose to the building's sliding door and it didn't keep it one bit warmer inside!

Was I supposed to open them?
Sunday, November 11, 2007

Pictures I promised


Here's a quick "tour" of the apartment so far. You may be able to "follow" this sequence better by opening the earlier past post of the floor plan in another window and referring to it as we go.

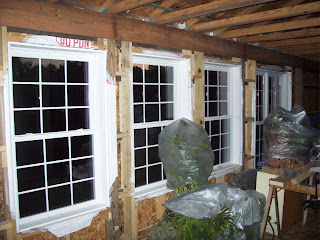
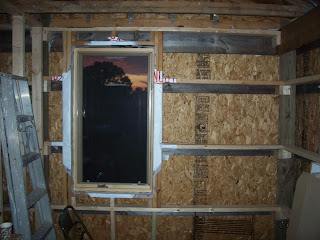
The living area is one large room with the kitchen at its west end. This picture shows the bank of windows on the south wall and our house plants covered for the unheated nights.


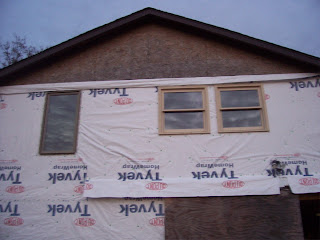
Here's the same wall from the outside. The large window on the left is where the dining "booth" furniture will be.


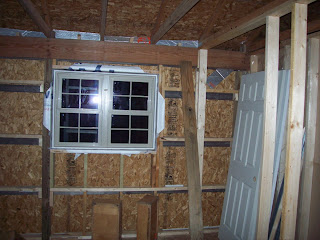
Moving clockwise, next is the kitchen area and the bathroom.


And here's that wall from the outside.


And finally the bedroom, inside,


and the north wall outside. The lower window on the north wall is at the stairway landing. There is another window on that wall but its opening hasn't been cut in the Tyvek yet because it will be installed after the panels are nailed up.


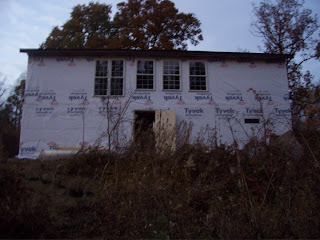
Yesterday we nailed up the first exterior panels. this is the lower level of the east wall. Remember, the easternmost 8' by 24' section of the barn is not part of the apartment.

A panorama view downhill


I'm trying a program that "stitches" photos together. Here's my first effort looking down the hill from about 50 yards west of the pole barn.


The sky didn't stitch too well, but maybe I'll find a way to deal with that.

Green View Springs property runs to about the first horizontal line of trees. The hills in the background are about 2 miles away.

Wednesday, October 31, 2007

Tiny visitor


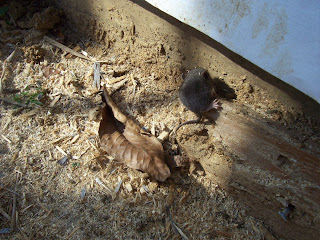
I know I've posted a mouse picture before, but this little guy was running around the barn while we were working today. Later I found him/her with two siblings. By the time I got the camera only one was still out from under the main step.

Finally, some windows


We have been working hard to get the windows framed so we can nail the Tyvek to the walls. My sister has come to help for a few days, and so far we're three-quarters done with the Tyvek and seven of the 13 windows are installed. I'll post some pictures soon.

There are two kitchen windows, one bathroom window, one at the top and one on the landing of the stairway and one in the bedroom still to be installed. It looks like they'll get done on Friday. Tomorrow includes a trip to the Restore in Indy and a flooring company showroom.

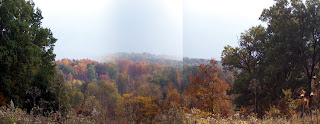
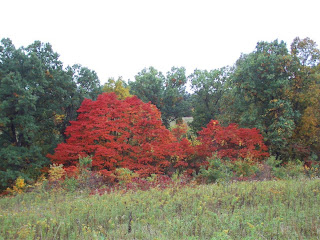
Here's a view of the changing colors looking down the hill from the pole barn.

Wednesday, October 17, 2007

The apartment takes shape


I just realized I haven't posted to the blog for three weeks. Here's what I've been up to...


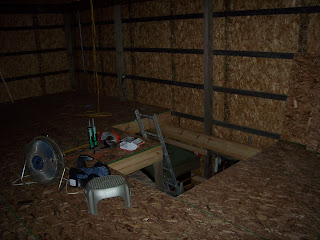
The entire floor has been completed. The top picture is a view of the stairwell from the main room. The far left corner is where the bathroom will be built.

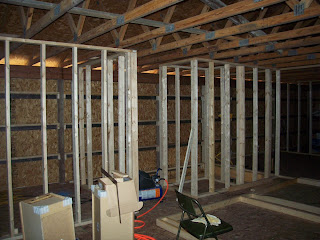
The second picture was taken after most of the framing was completed. This view from the kitchen area shows the bathroom on the left, the hallway closet in front of the stairwell and the bedroom to the far right. Some of the studs in the bedroom doorway are not in place yet so I can move in the closet wall. It is on the floor in the main room. It will have two sets of sliding doors and run the full length of the east wall of the bedroom.

We have found a dozen windows at a local resale store and hope to purchase all or most of them very soon. Once we decide on the windows, I can frame the walls to accommodate them and cut the openings in the exterior sheathing.

After that, we can add the Tyvek on the outside and install the windows. Then comes the really heavy work - installing the outside paneling. Each of the sheets is very heavy. The first (bottom) row of the panels shouldn't be too hard to install, but the upper row will be eight feet off the ground and require help just to lift them into place and hold them while they are nailed.

I'll keep you posted.

Tuesday, September 25, 2007

Praying mantis


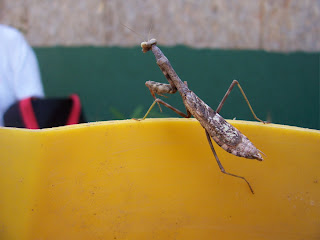
This little guy/gal? joined us for lunch on the lip of a yellow pitcher.

This picture is just about her/his actual size.
If I had known to count them I could have learned whether this is a male or female by the number of segments on the underside of the abdomen - eight for a male, six on a female.

You can read about them for yourself. Amazing what one can find on the internet, eh?

Monday, September 24, 2007

Water, water everywhere


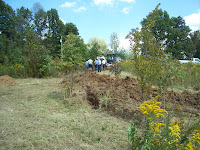
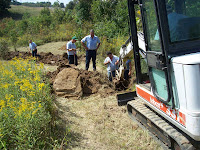
Today I arrived at the barn to find a truck from our water company parked near the road. Its driver was there to tell me they needed to dig on the northwest hill, below the road, to find a leak that apparently had occurred, or at least worsened enough to be noticed, over the weekend. It took half the day, and they dug a trench at least 100 feet long, but they finally found a broken pipe that serviced our neighbors across Route 54. If only they had known where the problem was, the whole job would have taken less than an hour.

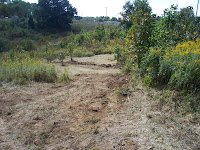
Here's a view from about where they started digging. You can see they're way up the hill by now, following the underground stream.


And here's looking down the hill.


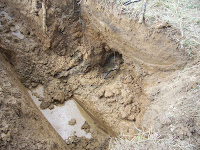
Here's the culprit: the small black pipe. It was replaced in minutes, lots quicker than if they had had to patch the main line that it comes from below.


They did a pretty good job of refilling the trench,


and they moved a few large rocks like the ones we found below the barn up next to the driveway.


They'll be back after it rains a few times to smooth things off and replant over the trench. (Yeh, like it's going to rain.)

Saturday, September 22, 2007

Our first campout


My son, his wife and daughter, visited us from Florida the last two days. He has to be back at his base in Jacksonville on Monday so they left this morning to be home in time to watch the Colts game.

Yesterday he helped me lift all the large joists up to the second floor height. That makes it a lot easier to install them because I only need to measure to mark their positions on the beams and headers, stand them up and nail them. Today I got a full quarter of them installed by myself in just a few hours.

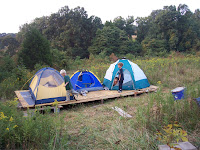
Thursday I built a quick and dirty platform on which to pitch three tents for our seven-person camp out. Here's what they looked like, and the whole thing stayed together! You can tell the slope of the hill there by the space under the nearly level platform.
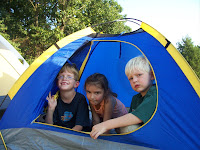
As you can see from this picture, Sandy's youngest grandsons also joined us. The kids seemed to have a great time. After a grilled dinner, we built a campfire where we told ghost stories and toasted s'mores. The stars weren't quite as brilliant as usual, as the half-moon was casting shadows. We took turns admiring views of the moon's surface through our binoculars.
Tuesday, September 18, 2007

Up it goes!


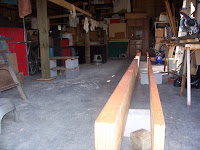
We purchased a 32-foot laminated veneer lumber (LVL) beam to be sure the apartment floor would be strong enough to support whatever we might put up there. It came in two parts and weighs, both parts total, 432 pounds.

Here're the two parts waiting to be lifted.

When it arrived and I realized I could barely move it, let alone lift it, I started thinking about how to get it up on the posts.

I thought about using slings and pulleys. I was told the roof trusses were designed to support weight from the top, not the bottom, and the lower joints on the trusses might not hold with a large weight hanging on them.

I considered using sections of heavy posts on their sides, in two stacks, relatively close together near the center of the beams. Since the beams are so long, it would be easy to lift an end by pressing on the other end. By pushing down on one side, a helper could easily slide another post section under the raised side, and the process could be repeated again and again, alternating ends, until the beam was just a bit higher then the posts. From there it could be pivoted onto the posts. The whole process would be repeated for the second beam part.

It was a brilliant idea, until... I asked myself, "What's going to keep the tall stack of support boards from falling over when the pile gets more than few feet high and the center of gravity, when the beam is pushed down, shifts to outside the stack?" Answer: Nothing. Scrap that idea.

Finally I though about using a small front end loader that could just lift the darn things and no one would be at risk. We would just provide a little support on opposite ends to keep the beam from tilting as it was lifted. I called my neighbor to see if he knew someone relatively nearby who might bring a machine to the barn. He said he did, and even came by to drive me to meet him.

Just a bit down the highway lives a neighbor who owns Greene County Wood Products, a maker of wooden pallets. They have two loaders, but only one that could get to the barn, a distance on the road of about a mile. Unfortunately that one is over ten feet high and wouldn't fit through the barn door. (We also discussed whether the weight of a loader might crack the concrete floor.)

Instead of saying "No" though, he suggested he would bring a bunch of his workers and we could all just lift it up. Yeehaa! To be ready for them I needed to set up some sturdy supports at each post and get one full half of the barn emptied so the job could be done quickly, but this solution sounded real good to me.

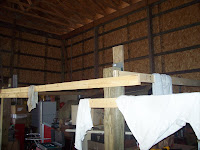
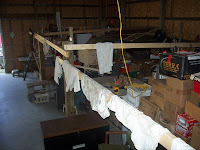
Here's what the barn looked like before the beams went up. Before you ask, that's not clothes drying, it's dirty t-shirts. I got tired of whacking my head on the braces.


Today, right after lunch, he and four of his guys came over. In two minutes the job was done!

First the wider "half" goes up, and on.

Then the skinny one.

Next the smaller beam will be nailed to the larger one to give the beam its full strength. Then the brackets will be installed and nailed to attach and stabilize the completed beam to the posts. Finally today, the lateral braces can be removed (with the dirty laundry).


Tomorrow the joist headers and joists start going on.

Sunday, September 16, 2007

Rocks and roses


Last week while walking the property Sandy discovered some rocks she thought might be useful at the barn. Today she took me to see them.

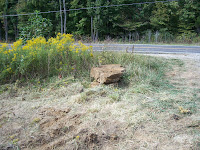
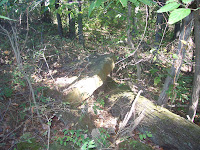
Holy cow! Some of them are huge. The rock next to the fallen tree below is about 6 feet across one way and about 8 feet the other. Maybe some day we can get it dragged down the hill to use in building a dam below the spring. I doubt it would be worth the effort of moving it up the hill.


Apparently not wanting to waste the walk, Sandy decided to whack off a large multiflora rose. This is one of Indiana's most invasive exotic plants. We have them scattered around the property. They're not a big problem yet, but we don't want them to get ahead of us.

The species is such a problem in the state that it is against Indiana State Law to plant any variety of Rosa multiflora without a permit issued by the director of the Indiana Department of Natural Resources' Division of Entomology & Plant Pathology (IC 14-24-12-5).

One of the smaller large rocks can be seen in this picture also.

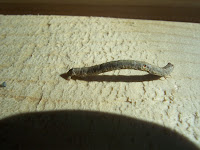
Inch and a half worm


As I came back from a short hike yesterday, this little fellow came along for the ride. I put him back into the high grasses after taking this picture. Click on the picture for a detailed closeup.


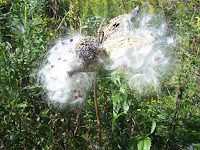
Near the bottom of the hill there are a lot of milkweed plants expelling their seeds. This one was particularly bushy. Each seed is attached to its own tiny cluster of silky down that serves as its own parachute. Unfortunately the other grasses are growing so tightly around each plant that most of them don't get to fly very far. I took a handful of the seeds and their down to the barn. In the spring I'll see if we can get them to grow so I can plant them in more areas of the property. I'm thinking of it as growing my own monarch butterflies.


Here's a nice link to the Kid Zone web site about milkweed and monarch butterflies.

Making a barn a home - Entryway


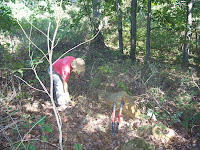
For the past few days Sandy has been working with a shovel and pry bar digging up pieces of broken concrete that were apparently dumped as the barn was being built between the gravel leading to the sliding barn door and the side door. I've helped lift the largest pieces, but she's done all the hard work otherwise.

This is what it looked like before she started. You can see weeds along the wall which are thick and grow in dense clumps. She is pulling them out as she goes. Then she flips the concrete pieces over and away to the south (left in this picture).

Notice Sandy's homey touch - the welcome mat.

There is a wood apron around the entire building except directly under this door. This will allow us to slide a concrete chunk right up to the concrete at the doorway without risking moisture seeping into the bottom of the wall there.

Here's what it looks like after the concrete is pulled away. In the soil underneath there is a thick network of roots from the grasses and weeds that were there. She is trying to pull all of them and toss them down the small bank.

Next she plans to replace the concrete pieces so they form a flat walkway sloping away from the building just enough to encourage water. We will need to import some sand to level the concrete and we'll probably
leave a small border of soil for planting something at the wall.